Wednesday, December 19, 2012

Dirty Drinking Gasses? Out, Out, Darn Spot!


So, today is bleak and dreary where I am. A lot like my glasses. After they come out of the dishwasher. And that’s just not right.
I’m convinced that it will be the minor things that completely unhinge us. Am I right? What’s on your list?
One of the things on my list was spotty glasses. Now I know this sounds trivial, but everyday when I pulled a drinking glass out of the cabinet, it would depress me to see that what was once a shiny sparkling glass was now a cloudy mess. Almost white. Really, really bad. Got to the point where I didn’t want to offer a drink to anyone!
Anyway, before you think I’m just a terrible glass washer, let me place the blame where it belongs. It’s not my fault.
I live in the Northeast United States. We have really, really hard water. Full of all sorts of wonderful minerals. Minerals that leave your glasses and dishes looking like you never wash them. (This also means that we need to replace all of our faucets every few years. But that’s another story for another day.)
Today I’m here to tell you I have found the Holy Grail, the answer to my cloudy glass problem. And it truly is a miracle.
Non toxic.
Cheap.
Easy.
(And no, the answer isn’t buy all new glasses. I already did that. Only a temporary fix).
The answer is – common everyday white VINEGAR!
You will not believe how this solves the problem. And it’s probably in your house already. Gotta love solutions like that!
The Steps
1. Get a really big bottle of vinegar. Costco sells it by the gallon jug. Perfect.
2. Pour the vinegar into a basin or bowl.
3. Put your glasses in. It’s best if you can submerge them, that may require purchasing 2 gallons of vinegar. I put mine in and rolled them around.
4. Let soak for an hour.
5. Give a quick scrub – and voila! Your glasses will be sparkling again!
How can it be so easy you ask?
I don’t know.
I don’t care.
I’m just happy it works.
My second favorite use for vinegar? Getting rid of the hard water deposits from the above mentioned hard water. Just soak a cloth in vinegar, wrap it around the base of the fixture where the deposits accumulate, leave it there for the entire day, then just wipe away the residue.
Again – how does it work? I have no idea. Do I care? Nope.
There are hundreds of uses for vinegar. If you get so excited about your clean glasses and fixtures and just can’t stop using it, click here to find out more ways vinegar can be your new best friend.
And for those of you chanting about how I should just get a water softener – I have one. It just hasn’t been installed yet. And that’s really a story for another day!
I’m Evelyn Cucchiara of The Hopeful Life, and my goal, my reason for being, is to make your life easier. I teach crazy, busy people with no time how to lose the crazy and get more time.
I’m all about the shortcuts – shortcuts to getting out the door in the morning, shortcuts to getting dinner on the table. I admit it, I’m a very selfish person, I like my me time. That’s what my shortcuts are designed to do – get you more time. What you use that time for is up to you! Over on my website, The Hopeful Life, I share tons of shortcuts on how to make your life HOPEFUL – which stands for Happy, Organized, Peaceful, Efficient and Full of Fun.

Thursday, December 13, 2012

Nesting 101


The weather is turning brisker, the days are getting shorter – time to nest.
No – not the type of nesting you feel compelled to do right before you have a baby. In my world, those days are long gone. This is nesting for you.
I’m talking about setting up a happy place for you, a safe place, a nest.
I’m talking about outfitting your bed as the sanctuary it needs to be.
I’m talking soothing colors, everything at your fingertips.
Here’s a list of what makes my life better – at least more comfy….
emptiness. No clutter. No dirty dishes. Just the basics.
a clock with a push light – I wear contacts and can’t see a clock across the room, nor do I want a glowing clock right next to me. This works perfectly. I push the button on top when I need the light, perfectly dark when I don’t.
reading lamp
down quilt
squishy pillows
heated mattress pad. This is one of my all time favorite things. I got it at JC Penny. Instead of an electric blanket, this heats up under you. And it’s dual control, so only my side needs to be on. I turn it on before I get into bed, and then it’s warm and comfy for me when I get in. And the control is mounted on the side of my night table, you can just see it in the picture. This way when I want to adjust it, I can just reach out my hand. No fumbling in the dark. I attached it with Command Adhesive strips.
remote control for the lights. I have one remote that does all the lights in the bedroom. Invaluable for when you are reading in bed and want to turn the lights off. No getting up! I’m going to mount that on the wall also. Right now it sits on the table, but I’m always knocking it down – so to the Command Adhesive I go!
a cat – this is optional.
This past weekend I did something I never do – I woke up, made the bed, and then decided that I didn’t want to get up. So instead, I postponed the day and spent time just lounging in bed. I wasn’t sick, it just felt right.
I suggest you do the same if you possibly can. Makes a world of difference in your outlook on life. One day not being responsible for things evens out the playing field somehow.
Thanks for listening. I'm Evelyn Cucchiara of The Hopeful Life, where I show crazy, busy people with no time how to lose the crazy & get more time. I'm all about the shortcuts.
Shortcuts for getting out the door in the morning, shortcuts for finding more time in your day, shortcuts for living life the way it should be - Happy, Organized, Peaceful, Efficient & Full of Fun - HOPEFUL!
Stop by my website for my free tip sheet - 7 Ways To Calmly Get Out The Door In The Morning. http://www.TheHopefulLife.com
Evelyn

Saturday, December 8, 2012

What Every Good Party Goer Needs To Know - NOW!


The holidays are approaching f-a-s-t and you probably have been invited to a few parties/dinners/shindigs.

Now you have to figure out what to bring as a hostess gift. Not wine. They have enough wine. And it’s really boring. You’re not boring.

It would be a wonderful gesture to bake something. But maybe, just maybe, that sounds like a whole lot of work. You want the kudos, but not the work, right? I’m with you.

No problem. I’m here to tell you about the best shortcut ever.

This is what you should bring to every holiday party you’re invited to this year. Every occasion. Every dinner. Every shindig.

It’s muffins. 
Wait - it’s not as boring as it sounds.

It fulfills all the things you want a great hostess gift to be.
It’s easy. It’s different. It’s appreciated. It’s low cost (okay, let’s call it what it is - it’s cheap!)

These super easy muffins are the absolute BEST HOSTESS GIFT EVER! Why? Because you’re going to present them with a bit of a twist. Here’s what you do - bake a batch of these muffins, pop them into a basket, and present them to your hostess. Stay with me here - 

Here’s the twist - attach a note stating that they are for breakfast tomorrow! You have just given them something they didn’t even know they wanted! You have made breakfast for them! 

You will instantly be the most favorite guest ever! You’re thinking of them, you’re making their life easier, and you’re making your life easier too.

Promise me - from now on, you’ll make your life easier & more HOPEFUL (Happy, Organized, Peaceful, Efficient & Full of Fun) by NOT running out to the store before you go to a party. You’re going to bake in less time then it takes the coffee to brew. Have faith. You can do this!

Why? Here’s why:
  • mixes up in less than 5 minutes
  • uses ingredients you probably already have on hand
  • healthy – whole wheat flour, low-fat, low sugar
  • everyone will love them!
Remember, next time you’re invited to a party, leave the wine at home. They already have wine. They don’t want more wine.

Bake them these muffins, pop them into a basket, and present them with a card saying they’re for breakfast the next day. The party hosts will love you…….’nuff said.

Here’s the recipe.

Ingredients:

  • 3/4 cup milk
  • 1/2 cup oil or applesauce
  • 1 egg
  • 2 cups white whole wheat flour – Trader Joe’s or King Arthur. (Regular white flour is fine too, just not as healthy.)
  • 2/3 cup sugar
  • 3 teaspoons baking powder
  • 1 teaspoon salt
  • cinnamon sugar mixture in a shaker bottle or bowl

Directions:

  1. Heat oven to 400 degrees. 
  2. Spray muffin tin with cooking spray.
  3. Mix milk, oil/applesauce & egg in a bowl. 
  4. Add flour, sugar, baking powder & salt. 
  5. Stir until flour is just moistened. Do not over stir.
  6. Use an ice cream scoop to fill muffin cups 3/4 full. 
  7. Sprinkle cinnamon sugar mixture on top. 
  8. Bake 15 – 20 minutes until brown.

That’s it. In a few minutes you’ll be done, and as a bonus, your home will smell wonderful!

And the recipe is infinitely changeable – add a handful of berries, some chocolate chips – whatever sounds good to you!

C’mon on – give it a try. See how much more organized you can be by not running out to the store. And how much more popular you’ll be next year when the party invites are going out.


I’m Evelyn Cucchiara of The Hopeful Life and my goal, my reason for being, is to make your life easier. I teach crazy, busy people with no time how to lose the crazy and get more time.

I’m all about the shortcuts – shortcuts to getting out the door in the morning, shortcuts to getting dinner on the table. I admit it, I like my me time. That’s what my shortcuts are designed to do – get you more time. That’s what The Hopeful Life is all about.

Happy, Organized, Peaceful, Efficient and Full of Fun.

be happy!

Evelyn
ps – I just launched my shortcut product for WAHM’s (work at home moms) – a unique way to get your message out to more people. And get them on your list. 

Details here: http://bit.ly/TzOKHD

Saturday, December 1, 2012

What's Your Front Entrance Saying about You?


A forlorn front entrance is a sad, sad sight. It’s giving off a sad, sad message. That sad, sad people live there. Don’t let this be your 1st message to the world.
No matter what season it is, I’ll bet the area by your front door is looking a bit tired. Time for a spiff up. Especially if you are about to decorate for the holidays. Decorations on top of dust, debris and general all around dirt does not a festive holiday make!
So here’s a short list of what needs to be done – before the lights and animated figures make their appearance at your house. What, you don’t FEEL like doing it? Just do it.You’ll be glad you did. And Santa will thank you later.
The Easy, Peasy Steps to Spiff Up Your Front Entrance.
1. Give your front stoop, porch, steps, whatever a really good sweep. Get rid of all the debris. Leaves, sticks, dead bugs, cobwebs – it all has to go. (Unless you’re decorating for Halloween, then leave the cobwebs.)
2. Get a new door mat if needed. This is the best defense against tracking dirt into your home, so make sure it’s earning it’s keep. In the list of priorities for a door mat, grabbing dirt from your shoes is first, looking great is second. Those coir mats that come with holiday colors and pictures should be a distant 26th. They don’t actually remove dirt from people’s shoes, they just shred up and disintegrate and end up tracking more dirt into your house. That’s why they’re so cheap. Spend money for a good mat and it will last you for years. And you won’t have to swap it out with each holiday. (Just a side note – I don’t know which I deem the most useless and unneeded holiday decoration – door mats or toilet seat covers. Really? What would you want to store a holiday door mat and/or toilet seat cover.? If anyone has a good reason, or feels strongly that I’m wrong, just let me know. Please. I really want to know. “Cause I just can’t understand it.)
3. Take a close look at the door surround. That’s the wood or metal trim that goes around your door, attached to the house. Is it chipped in places? Does it need some touch up? If so, break out the touch up paint. How about the door hardware? I just noticed that my storm door handle is missing almost all of its black paint. Doesn’t that send a warm and welcoming hello to everyone…..
4. What’s hanging on your front door? Make it something cheerful, colorful. Be sure to change it with the seasons (that’s only 4 times a year, not too much to ask). And make sure it is flat. There’s nothing worse than being assaulted by a cumbersome wreath or flower arrangement when trying to pass the front door. Flat rules.
5. Polish up any glass on the door or storm door. Best method – use a squeegee. It gets all the dirt and grime off in one sweep so you don’t have to keep going over the same area. Click here for a video to show you how.
6. How’s the mailbox look? Take care of any needed maintenance. Same goes for the door bell or door knocker. And if your doorbell isn’t working, get it fixed immediately! Bad karma…..just saying.
7. If you have room, put something decorative outside the front door. Maybe a pot of flowers if it ever gets warm enough, maybe a box or bucket guests can put their wet umbrellas in. Just make sure you don’t take up so much room that it’s difficult to get in the door. Simplicity is the key word here. And always.
Looking good now! Santa would be proud. Maybe he’ll even fill your stocking extra full this year! As usual, it comes down to making things easy and accessible. Simple shortcuts to get things done quickly and easily. That’s what I’m all about.
I’m Evelyn Cucchiara of The Hopeful Life, and my goal, my reason for being, is to make your life easier. I teach crazy, busy people with no time how to lose the crazy and get more time.
I’m all about the shortcuts – shortcuts to getting out the door in the morning, shortcuts to getting dinner on the table. I admit it, I’m a very selfish person, I like my me time. That’s what my shortcuts are designed to do – get you more time. What you use that time for is up to you! Over on my website, The Hopeful Life, I share tons of shortcuts on how to make your life HOPEFUL – which stands for Happy, Organized, Peaceful, Efficient and Full of Fun. Come visit me

Tuesday, November 27, 2012

Stop the Madness NOW!


The holidays are coming – are you ready?

Have you put in place ideas and shortcuts that will make your life easier?

No? Why not? What are you waiting for?

Ideas you say? Steps you say? Then you’ve come to the right place.

Here you will find the ONE idea that rises above all others.
The one that will give you back your time.
The one that will cause you to do a happy dance.

I’m talking about THE FAMILY CLEAN UP.

What is that you may ask?

It’s a simple idea that removes YOU from being in charge of keeping your house neat. It removes YOU from being the person who bugs everyone else about keeping the house neat.

Takes a bit of rewiring your family at first, but then it’s a no brainer.

The simple steps:

  1. 1.Gather your family together twice a week. We use a bell, the same bell we ring for dinner time.

  1. 2.Everyone choses a job to do. In our house the choices are – quick vacuuming, cleaning the bathrooms, dusting and decluttering. You’ll have to spend some time at first showing your family members exactly how to do the job, but it’s worth it. Soon enough everything is running smoothly.

  1. 3.Each family member goes off and does their job. Since you’re all working together, no one feels they got the short end of the stick. And everything gets done quickly.

  1. 4.Results? In just 15 minutes or less, your house is neat, tidy and clean. (At least on the surface. I do a deeper vacuuming and bathroom cleaning once a week.)

  1. 5.Benefits? You no longer have to vacuum under kids feet while they are playing video games. That alone makes the entire thing worthwhile!

Now, I know you’re saying this will never work in your house.
Yes, it will.

Exclude no one from this, and expect them to show up. It might take some cajoling at first, but soon enough everyone will understand you mean business. And the trick to getting everyone to show up promptly? First come gets first choice of jobs!

The long term results of this idea are as follows:

  1. Your kids learn all types of home care jobs – enough to keep them going once they leave the nest.
  2. You are not a one woman cleaning team anymore.
  3. Your house is guest ready at all times.
  4. No one is late because first there gets first choice of jobs.

Try it out! Your family may surprise you…..one of my sons always picks cleaning the bathrooms!

Yes, it’s a bit radical to expect your family to help keep the house neat, but trust me, it works! It’s simply another shortcut, one that works for you and not against you.

What do you have to lose?

Do this one idea regularly, and your life will be saner. You will be happier. And your house will be neater.

See you next week!
Evelyn

PS – If you’re in need of some shortcuts designed specifically for the holidays, check out my free webinar replay called 

“Cancel the Crazy This Christmas”.

I guarantee your get some great ideas! Just click here:

Thursday, October 25, 2012

A Better Playroom!


Hey everybody! Welcome back to another blog from me, Evelyn Cucchiara of The Hopeful Life. My goal is to make your life easier. Better, more fun. All that stuff.

Speaking of stuff - raise your hand if you’re drowning in stuff. Yup, I bet your hand is raised. Stuff seems to creep up when you’re not looking, and if you don’t do something to tame it, before you know it, it’s taken over your life. Or your child’s life. 

Which brings us to today’s topic. Playrooms.

Doesn’t it seem like there’s never any playing going on in there? Time to take it back, make it simple, and make it work. Here are the easy ways to do just that......

Let’s Put The Play Back in Playroom!

I bet your playroom is a mess right now. Time to end that. You’re going to make the playroom work for you, not against you. It’s time to put a bit of structure in there. 

Otherwise, you might as well call it what it really is – a giant closet.

Just adding or subtracting a few things will make a world of difference. The playroom will suddenly become a place that the kids actually want to play in. And it will almost clean itself! (I’m not kidding.)

Here are the super secret shortcuts:

  1. Install an entire wall of cubbies. Shelves will work, but cubbies work better. Easy & cheap wire cubbies work great, and you can get them at Costco or any big box store. They come in flat square grids, and you bang them together with a rubber mallet. Best part, you can do it yourself without waiting for someone help. Buy as many as you think you will need, then buy more. The goal is to get an entire wall covered, floor to ceiling. The beauty of these is that they are easy to move around – and collect NO DUST!

  1. Big toys – put one in each cubbie. And label them by taking a photo of the toy, punch holes in the photo & use paperclips to hang the picture on the cubbie. This way your kids and any guests know where everything goes. As the kids get older, swap out the photos with names of the toys to help build reading skills.

  1. Small toys – put like with like. A plastic bin of blocks, a plastic bin of people. Put one bin per cubbie, and be sure the bin fills up the entire cubbie. Ikea makes some good-sized ones. Put picture labels on the cubbies also.

  1. Get a large wood box for big, awkward things, like Nerf guns. Then put wheels on the bottom of the box so it can be easily rolled out-of-the-way if you need to store it in front of something like a closet. Ikea again for this one.

  1. ONLY PUT ONE TOY OR BIN IN EACH CUBBIE! If you have too many toys and not enough cubbies – rotate the toys. Pack up whatever doesn’t fit, put into deep storage, and 6 months from now bring them out. It will be like Christmas all over again for your kids. Put the previously stored toys out, pack the old ones up into deep storage. There’s no reason that all the toys need to be out at the same time. It’s confusing for the kids and just makes a bigger mess.

  1. Get a drop leaf table for when you need table space for puzzles, etc. Fold it up when you need it, fold it down when you don’t.

  1. Get a tall laundry basket, box, something that you can put stick type toys into – hobby horses, extra long Nerf guns, swords etc. into. Put this in a corner so it’s easily accessible, but out-of-the-way.

The idea is to make it fun for the kids to put stuff away. If each toy has a designated home, it’s easy to put back. No time is spent looking for an empty place to put it. Make it a game. Set a timer for 5 minutes and see how many things can be put away! I’m a big fan of the photo/names of the toys as a label, and labels on the cubbies. Works like a charm!

Do you know one of the basic rules for keeping a place neat and organized? Make it harder to get something out then to put away. When your child wants a particular toy, they’re motivated to work a bit to get it. When they are done with it, all motivation is gone, so you have to make it really easy to put it away. So, no lids, no covers, just big bins/baskets that pieces can be tossed into.

Make the playroom easy for the kids to use, and you all win!

In case you ended up here in some back door way, and you’re not already a fan, I’m Evelyn Cucchiara from The Hopeful Life - showing you shortcuts to make your life happy, organized, peaceful, efficient & full of fun. And save you tons of time to boot. Hop over to my site and grab a free gift to make your life easier! Just click here!


Thursday, October 11, 2012

Who's Cooler? - Part 2


I’m back again. I know you’ve been waiting with baited breath to find out how to make the inside of your fridge great. A sight to behold. A wonder of the kitchen. Or at least how to make it work for you, instead of against you.

Good news. Your wait is over. Yay!

Here are the easy shortcuts, the super simple step by steps. How to be happy in a nutshell. At least when it comes to your fridge!

Today's topic - Part 2 of shortcuts for refrigerators - the inside. 

The fridge. the last place you probably want to spend any time on. But I promise you, these shortcuts I’ve listed below WILL MAKE YOUR LIFE BETTER. And easier. So you have more time. For other things. That are more fun.

Set the fridge up once, and it will reward you with time over and over again.

Ready? It’s time to turn your fridge into a lean, mean, cooling machine.   

  1. 1.take everything out. (have you noticed that's always the first step of any reorganizing job?)

  1. 2.toss anything that is past its expiration date, or anything you just never use.

  1. 3.wipe down the shelves with a cleaning cloth and a food safe cleaner (vinegar and water, baking soda, whatever strikes your fancy)

  1. 4.line the produce drawers with newspaper (my drawers are the exact size of a regular newspaper section, go figure!) and a paper towel. This makes it easy to clean the next time - you just toss or recycle the whole bit.

  1. 5.get a small plastic turntable that you put on a short shelf. This is used for all of your condiments. Put it on a shelf and fill it up with all those small things that like to lurk on the back of the shelf. Spin it around when you need to get to something. See how cool that is? Here’s one at Amazon.

  1. 6.designate a leftover shelf. Anything that needs to be used up and/or is free range for snacking goes here.

  1. 7.give each family member their own reusable water bottle. Label them. Store these on the door. Family members can grab it easily and not use a glass. (run it through the dishwasher once a week.)

  1. 8.if you want to get fancy, put plastic place mats, cut to size on the shelves. These are easier to wipe off then the actual shelf because they are easy to remove. Just keep in mind they need to be replaced fairly often, due to wear & tear.

  1. 9.consider getting a milkman. Lots of areas have them now. Fresh milk, eggs, & juice delivered right to your door. Costs a bit more, but you're worth it. And it eliminates last-minute runs to the store and all those impulse buys. Have had mine for over 15 years! Just google "milkman" and your state to see what's available.

  1. 10.designate a bread shelf so all the bread products don't end up smooshed in the back of the fridge.

  1. 11.store fresh washed lettuce directly in the salad spinner you washed it in. Perfect atmosphere for lettuce - not too wet, not too dry.

  1. 12.put everything else back.

13. enjoy you're newly designed, better functioning fridge!

That’s it. You now have a happy fridge. And going forth, more time to do the fun things in life.

I’m Evelyn Cucchiara from The Hopeful Life - showing you shortcuts to make your life happy, organized, peaceful, efficient & full of fun. And save you tons of time to boot.

Tuesday, October 2, 2012

Who's cooler - you or your fridge?


Hey there! I'm back again to make your life easier and show you how to be happy. Really.

So - how's your refrigerator looking these days?

Crammed full? Inside and out? Doesn’t have to be like that. In fact, it shouldn’t be like that. 

Here’s how to make it better.

This week we start with the outside. Next week - we tackle the inside.

Time to rock & roll. Time to make it better. 

1. Remove anything you've stuck to it. Like calendars, shopping lists, vacation photos, magnets, coupons.There are better places for these things. Utilitarian calendars and notes - the best place for these are on the inside of your kitchen cabinets. Why not? It's empty space that no one has to see but you. Easy to access, easy to hide. Need to consult your calendar? Open the cabinet. Don't need it? Close the cabinet. Perfect. Post your calendar, shopping lists, whatever inside your cabinets and free up the front of your fridge. Now you can see them when necessary, but everyone isn't subjected to them. Now, how about those photos and magnets? Just more visual clutter that fills your mind up every day. Put the photos in frames or albums or recycling, get rid of last years holiday photo from people whose kids you don't even recognize, and lose most of the magnets. Now you should be looking at a clean slate, otherwise known as your fridge.

2. Next step? Give the surface a good cleaning with your favorite spray cleaner. Or just use a mixture of eco-friendly white vinegar and water. Any lingering smell of vinegar will dissipate, so no worries.

3. Now, put something on the fridge that makes you smile. One magnet - fine. 400 magnets - not so fine. Clutter stuck to your fridge is just as bad as clutter on your table. It all effects your state of mind and clogs your head up with useless stuff. Why not put something unique on the fridge? I have three small framed oil paintings - I found them at a garage sale and just glued magnetic tape on the back of the frames. Looks great - and I'm probably the only one on the block with that on the fridge! Different huh? Use your imagination - a favorite greeting card, a drawing from your child, Maybe a postcard from your brother who's traveling cross country....again. (Just saying.) The point is to use the space for something uplifting and fun, not just another clutter center. Kind of makes you see your fridge in a new way, right? Kind of shows you how to be happy, anywhere, anytime.

How's the outside of the fridge looking? Calmer? Happier? Making your world better?

Next week we talk about the inside. I've got great shortcuts for making the inside of the fridge work for you, not against you. 

Time for a reward. Go set a timer for 15 minutes and go read, sit in the sun, take a power nap, whatever floats your boat. Take some time for yourself, you've earned it.

Congrats! You've made a part of your world just a little bit better!

Want to see more? Just click here The Hopeful Life

Evelyn

Thursday, May 24, 2012

The Sand Pail List + an easy plan for the Best Memorial Day ever!


Summer is quickly approaching here in the north east, and with that comes the annual question of "what are we going to do this summer?" I don't know how it works in your house, but around here we always start with big plans, lots of ideas, and by the time the beginning of July rolls around, no one can remember anything they had wanted to do!

I used to write ideas down on a piece of paper, but it never seemed to live up to the excitement that summer promises. Then I graduated to a book, but again it never seemed quite right. Recently I discovered something that seems j-u-s-t right! (thanks Better Homes & Gardens for the idea!)

Presenting ..........

The Sand Pail List!


Think Bucket List - but for the summer. Sand Bucket List would also work, but there's something a bit morbid about that.......

So, Sand Pail List it is! Summons up feelings of playfulness, childhood and endless fun - just what summer should always be.

Here's how it works -
  1. make yourself a colorful cover - draw, paint, download - whatever. I did this one on Printshop.
  2. put a few blank pages inside - no more then 4 - you don't want to overwhelm yourself!
  3. gather the family and ask them - "what types of things would you like to do this summer?"
  4. write them down in the book - no particular order.
  5. keep the book somewhere handy  - I keep ours in our "treasure chest" for easy updates and check offs.
  6. once a week, schedule some time to do something on The Sand Pail List! You can do more then one a week if you like - just make sure you get to some of them!
  7. no pressure to do it all - as long as you do some, the summer will be a success!
  8. next fall, look back and remember all you did this summer in the name of fun.
If you happen to be hosting a party this Memorial Day weekend, make a few extra blank copies for your guests. They'll love it - and summer needs to be spread around! Bring back the fun!

be organized.....evelyn

PS - If you have no plans for the long weekend - here's my plan for the BEST Memorial Day Ever! http://bit.ly/Kd4Umi

Thursday, May 10, 2012

How To Organize a Bedroom with Little Furniture


Short, sweet and to the point today - How To Organize a Bedroom with Little Furniture.


Okay, I look like I'm living in a cave in this video, but ignore the surroundings - the info is golden.

Even if you use just one of the ideas presented here, your morning routine will go better. I promise.


Woo hoo ! After many, many days of rain - the sun is finally shining!!!!!!

be organized........evelyn

Thursday, May 3, 2012

Think You Know How to Tie Your Shoes? Think Again! Shoe Tying 101


It's the little things in life that drive you crazy. Like tying your shoelaces, only to have to tie them again a few hours later.

Always drove me crazy.....until I discovered how to "beat" the shoelaces once and for all.

Now, this isn't an earth shattering blog post, but it does make your life just  a bit easier,,,,,and that's my goal.

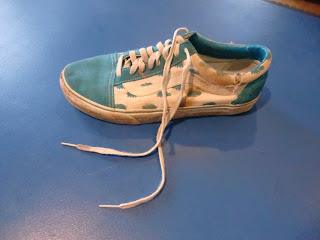
shoe - regular laces

Problem: shoelaces that always untie like magic - especially those round ones that are on all athletic shoes nowadays.

Solution:

1.tie an overhand knot at the end of each lace.


see the knots?

2. tie the shoe like you normally would, but pull the laces all the way through until you reach the knots you just tied. Normally you would only pull about half way, but instead, just keep pulling. The knots will stop the laces from pulling all the way through and out. Hard to explain, easy to do.

pulled all the way to the ends

3. tie another knot with the laces, i.e. a double knot.

tied once and for all!

That's it - you're done!

The action of pulling the laces all the way through to the knots is what keeps the knot from untying.

Don't knock it until you've tried it. Won't save you a ton of time every day, but it will save you a ton of frustration.

And yes, that is a really large (men's size 12) blue sneaker with hippos on it. Anyone else have a teen boy who's really into pop culture? Anyone?


be organized......evelyn

P.S. - Hey - I'm starting something new! In addition to my once a week blog posts (leave your email in the box on the right next to the title if you want to get them automatically), I'm going to start sending out a quick happiness idea every Friday morning. Want to be in the club that gets them? Shoot me an email at: evelyn@organizingwithevelyn.com or leave a comment below.